Roll Re-Alignment for Feed Mill
SECTION I: Starting up the mill
The in-feed should be shut off with no material entering the rolls. The guide arms or T.A.S. below the in-feed should be set just slightly from touching the rolls. The T.A.S. adjustment bolts can be found on the side of the roller mill.
RMS suggests beginning with a roll gap of 0.100”, or approximately 1 revolution of the adjustment bolt.
You can now start up the mill. Once started, move adjustments into desired gap setting then slowly feed the machine until the max amps or capacity desired is reached.
Note: DO NOT over amp your motors or motor failure will occur. If over amp occurs, reduce the feed of material until you are back under the max amperage.
SECTION II: Zeroing the Rolls
Parallel and zero the rolls approximately once a week, or whenever the desired material cannot be obtained.
Important: The machine must be empty before adjusting rolls.
-
With the machine running, stop the flow of material going into the machine.
-
Locate the roll adjustment points.
-
There are (2) adjusting hex bolts per set of rolls. Turning either bolt clockwise closes the rolls on the side turned. counter-clockwise rotation opens the rolls on the side turned.
-
Start by turning the left bolt clockwise until you hear the rolls just start to nick each other. Move pointer to zero when the rolls start to nick.
-
Turn the bolt back counter-clockwise to 8 on the reference sticker then move in clockwise to 5 (Any time you are moving the adjustment out (counter-clockwise) you must move past your target number and bring it back in to take the backlash out of the adjustment screw).
-
Move the adjustment in (turn clockwise) and repeat steps 4 and 5 using the 2 on the reference sticker as your starting point.
-
Once again, turn the bolt clockwise but stop turning just short of where the rolls start to nick. The idea is to leave the bolt set in the direction of closing the rolls, but just shy of where the rolls nicked.
-
Repeat the process with the bolt on the right side.
-
Continue doing this adjustment on both sides at least three (3) times. This ensures the rolls are precisely parallel.
-
All pointers can now be reset to zero.
Section III: Paralleling the Rolls

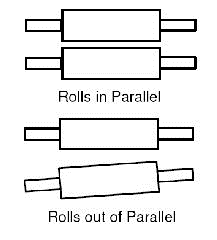
Rolls have been knocked out of alignment (out of parallel).
Follow the same procedures listed in Section II if the following events are observed:
• A foreign object is known to have been run through the mill.
• During normal re-alignment, you find that you must turn one hex bolt further than the other in order to nick the rolls, indicating that the rolls are out of parallel.
For additional information see our YouTube video! How to Properly Parallel and Zero Rolls